Creating a flourishing winter flower garden featuring Nigella, often called Love-in-a-Mist or Devil in a Bush, can seem daunting. However, with the right techniques and knowledge, you can effortlessly nurture this stunning flower into a vibrant part of your winter garden. This article will guide you through straightforward methods to hack your way to a thriving Nigella flower garden, ensuring you can enjoy beautiful blooms even in the colder months.
Understanding Nigella
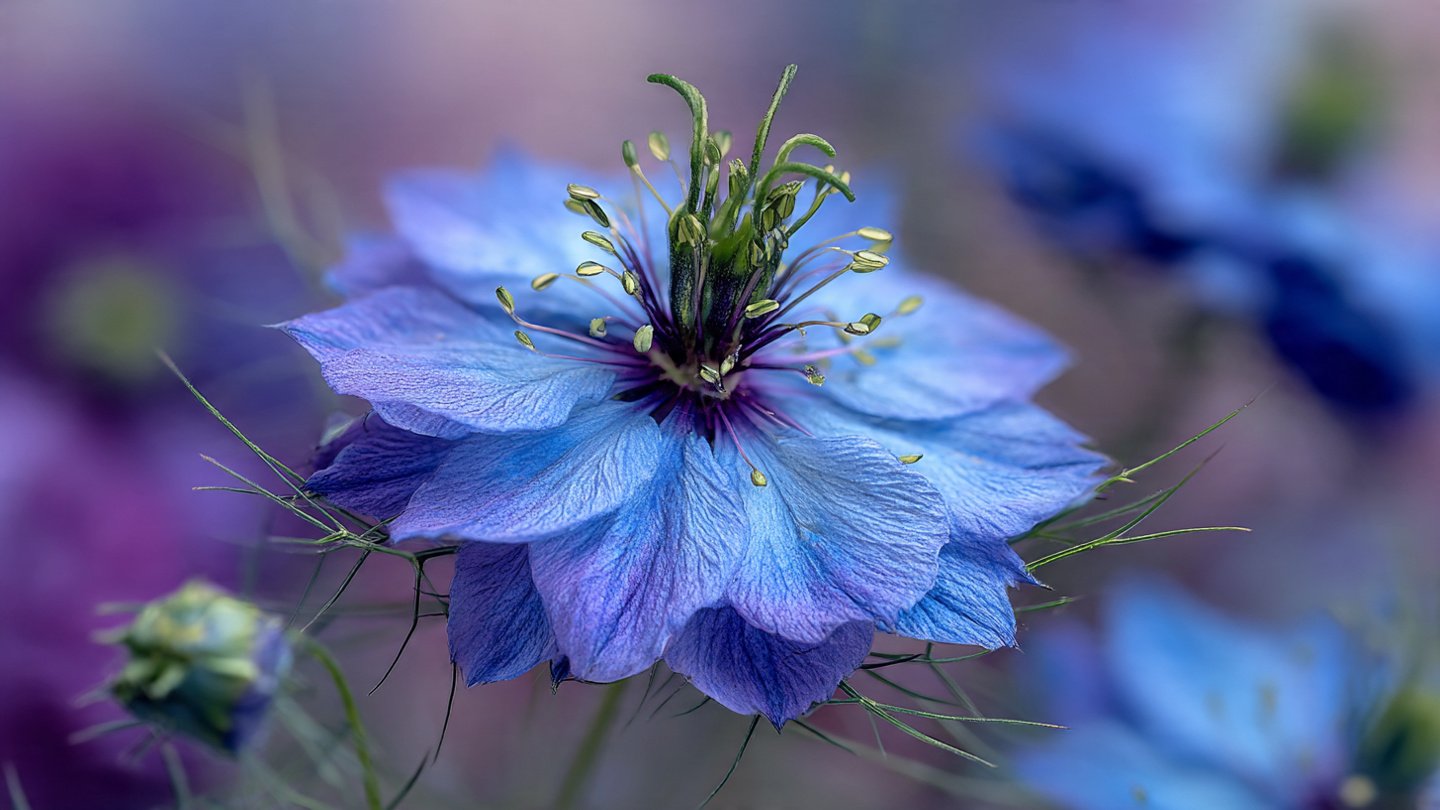
Before diving into the tips, let’s talk about Nigella itself. A member of the buttercup family (Ranunculaceae), Nigella sativa is not only an exquisite flower but also known for its culinary and medicinal uses. Its delicate, frilled petals, often in shades of blue, white, and pink, add an ethereal quality to your garden.
Latest Posts
- Easy Steps to Successfully Grow Bhindi in Grow Bags at Home
- Easy Steps to Grow a Healthy Guava Bonsai at Home for Beginners
- How to Successfully Grow and Cultivate White Strawberry Plants at Home for Delicious and Unique Fruits
- Ultimate Guide to Successfully Growing Weeping Fig Outdoors with Proven Techniques and Expert Tips
- How to Successfully Grow Flemish Beauty Pear Trees in Canada for Optimal Harvest
- Easy Hack to Grow Strawberries Year Round in Your Home Garden for Delicious Harvests
- Growing Flemish Beauty Pears in Canada A Complete Guide for Local Gardens
- The Ultimate Guide to Growing Hibiscus Plants Year Round for Vibrant Blooms and Healthy Foliage
- Easy Ways to Boost the Growth Rate of Your Indoor Peace Lily for Lush Green Foliage
- How to Successfully Grow Oak Leaf Lettuce in Your Home Garden for Fresh and Flavorful Salads
Benefits of Having a Nigella Winter Garden
- Visual Appeal: The unique blooms stand out against the backdrop of winter, adding color and texture to a typically monotonous landscape.
- Wildlife Friendly: Nigella attracts beneficial insects like bees and butterflies, promoting biodiversity in your garden.
- Low Maintenance: Once established, Nigella is relatively low-maintenance, requiring minimal upkeep while providing maximum beauty.
Selecting the Right Location
Sunlight Requirements
Choose a location that receives full to partial sunlight; ideally, Nigella flourishes in areas where they can soak up at least 6 hours of sunlight a day. This is crucial for robust growth and blooming.

Soil Quality
Nigella thrives in well-drained soil rich in organic matter. Conduct a soil test to determine pH levels; Nigella prefers a slightly alkaline to neutral pH (6.0 to 7.0). If your soil is heavy clay, consider amending it with compost or sand to improve drainage.
Ideal Planting Time
When to Plant
Though Nigella can be sown in spring, for winter gardening, the best time to plant is in late summer to early autumn. This allows the seeds to germinate before the cold weather sets in, establishing a root system for robust growth when spring arrives.
Seed Sowing Technique
- Direct Sowing: For best results, sow the seeds directly into the garden in well-prepared soil. Scatter seeds lightly and cover with a thin layer of soil.
- Spacing: Ensure adequate spacing of about 6 to 12 inches apart to allow room for growth and airflow, preventing diseases.
Watering Protocol
How Much Water?
Nigella is drought-resistant once established, but young plants require consistent moisture. Water gently to avoid displacing the seeds. Aim for at least an inch of water per week, either through rainfall or irrigation, but avoid waterlogging.

Moisture Monitoring
Use a moisture meter or your finger to check soil moisture levels. The top inch of soil should be dry before watering again.
Fertilization Strategies
Organic Amendments
Applying an organic fertilizer during the planting process will promote healthy growth. Use a balanced fertilizer with an N-P-K ratio of 10-10-10 or a compost tea for a natural boost.
Timing Fertilization
Fertilize again during the growing season, approximately once a month, to ensure continuous bloom and vitality.
Pest and Disease Management
Common Pests
Although Nigella is relatively resistant to pests, keep an eye out for aphids, spider mites, and other common garden pests. Use insecticidal soap or neem oil as a natural remedy.
Preventive Measures

Maintaining good hygiene in your garden will deter pests. Remove any dead plant material promptly and ensure good air circulation around your Nigella plants.
Mulching Techniques
Benefits of Mulch
Applying mulch around your Nigella can help retain moisture, regulate soil temperature, and suppress weeds. Organic mulches such as straw or shredded leaves can break down over time and offer additional nutrients to the soil.
Application Method
Spread a layer of mulch 2-3 inches thick around the base of each plant, ensuring it does not touch the stem to prevent rot.
Pruning and Deadheading
When to Prune
Deadheading, or removing spent blooms, encourages the plant to produce more flowers and prolongs the blooming period. Regularly check your Nigella plants and prune as needed.
Techniques for Pruning
Use clean, sharp shears to cut the flowers back to the base of the bloom. This encourages bushier growth and prevents the plant from going to seed prematurely.

Companion Planting
Suitable Companions
Consider planting Nigella alongside other winter bloomers like pansies, violas, or snapdragons. These species harmonize beautifully while providing benefits like pest control and nutrient sharing in the soil.
Planting Strategy
Interplanting can create a vibrant and visually appealing landscape. Place shorter plants in front of taller ones, ensuring that each species has access to sunlight.
Enjoying Your Nigella Garden
Creating a Visually Appealing Space
Use paths or stepping stones to create an approachable garden layout, allowing you to appreciate the beauty of your Nigella flowers up close without damaging them.
Seasonal Decorations
Incorporate decorations like garden stakes or ornamental chairs to make your winter garden a cozy retreat.

Final Touches
Harvesting Seeds
Once the Nigella blooms have dried and turned brown, you can collect seeds for next year’s planting. This not only saves money but also allows you to propagate your favorite varieties.
Sharing the Joy
Consider sharing seeds or cuttings with fellow gardeners. This fosters community spirit and adds diversity to your garden.
Conclusion
Establishing a thriving Nigella winter flower garden is an achievable goal with minimal effort. By selecting the right location, focusing on soil quality, implementing effective watering, and keeping an eye on pests, you’ll create a vibrant space filled with beauty and life. Embrace the process, enjoy the simple pleasures of gardening, and let your Nigella garden become a winter haven for both you and the local wildlife. Happy gardening!
With careful planning and a bit of love, you can turn your garden into a stunning display of color and life even as winter settles in. Start implementing these hacks today, and watch your Nigella flourish through the cold months!