Growing plants indoors can be a rewarding endeavor, especially when it comes to cultivating herbs like mint. Mint is a versatile herb packed with flavor, ideal for cooking, teas, and cocktails. It’s also known for its refreshing aroma and various health benefits. If you’re limited on space or simply want an easy way to garden, growing mint in a bottle is an excellent choice. Here’s how you can do it with minimal space and effort.
Understanding Mint Varieties
Before planting mint, it’s essential to understand the various types available. Some common varieties include:
Latest Posts
- Easy Steps to Successfully Grow Bhindi in Grow Bags at Home
- Easy Steps to Grow a Healthy Guava Bonsai at Home for Beginners
- How to Successfully Grow and Cultivate White Strawberry Plants at Home for Delicious and Unique Fruits
- Ultimate Guide to Successfully Growing Weeping Fig Outdoors with Proven Techniques and Expert Tips
- How to Successfully Grow Flemish Beauty Pear Trees in Canada for Optimal Harvest
- Easy Hack to Grow Strawberries Year Round in Your Home Garden for Delicious Harvests
- Growing Flemish Beauty Pears in Canada A Complete Guide for Local Gardens
- The Ultimate Guide to Growing Hibiscus Plants Year Round for Vibrant Blooms and Healthy Foliage
- Easy Ways to Boost the Growth Rate of Your Indoor Peace Lily for Lush Green Foliage
- How to Successfully Grow Oak Leaf Lettuce in Your Home Garden for Fresh and Flavorful Salads
- Peppermint: Known for its strong flavor, it’s often used in teas and candies.
- Spearmint: Milder and sweeter, used in recipes and beverages.
- Chocolate Mint: Adds a unique twist with its subtle chocolate notes.
Selecting the right type will depend on your personal preference and intended use.
Benefits of Growing Mint in a Bottle
- Space-Saving: An ideal solution for those with limited outdoor space.
- Portability: Easily moveable to optimize sunlight exposure.
- Minimal Maintenance: Requires less attention compared to outdoor gardening.
- Pest Control: Keeping mint indoors can help minimize the pest problem.
Materials Needed
1. Bottle Selection

Choose a bottle that suits your aesthetic and space. Options include:
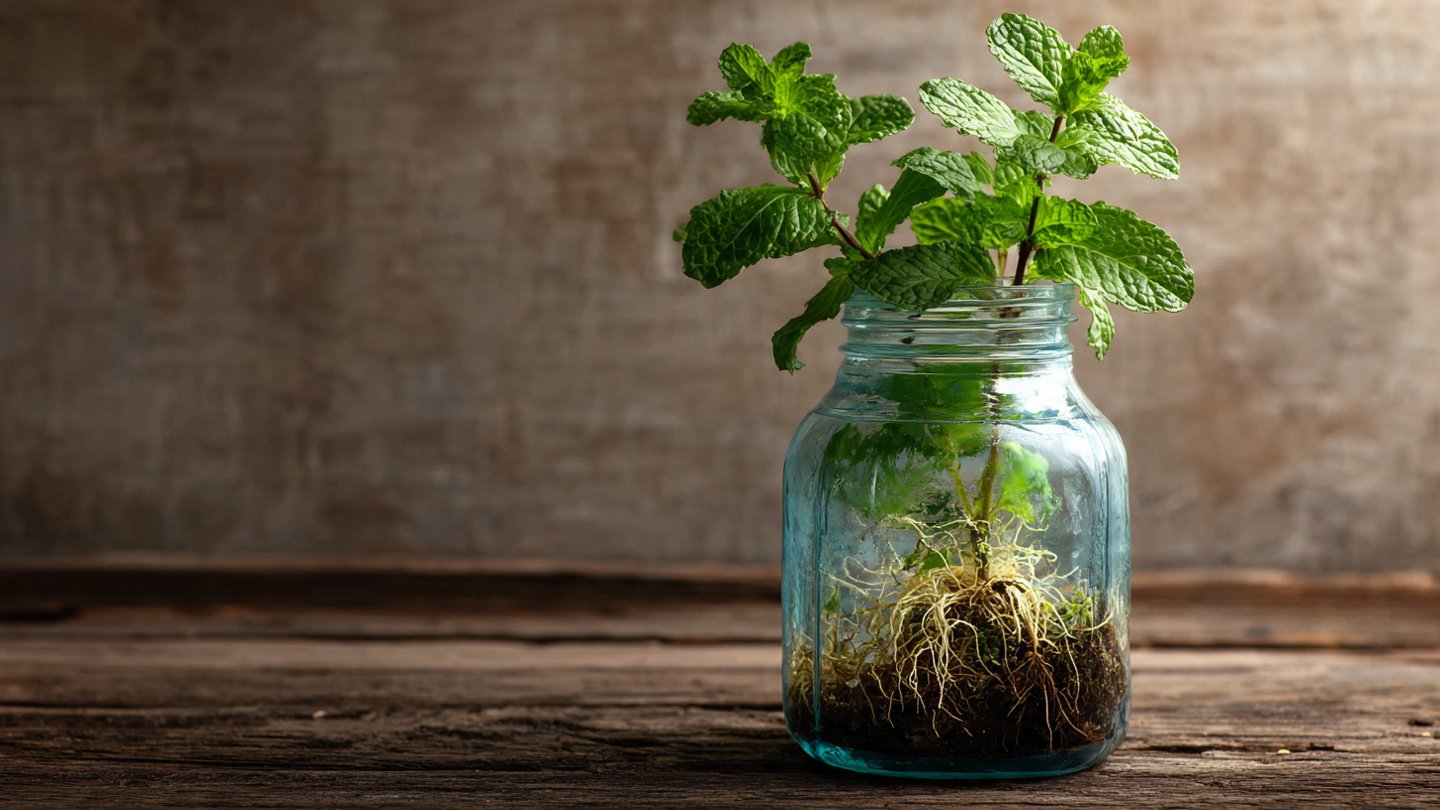
- Glass bottles: Clear bottles allow you to monitor root growth.
- Plastic bottles: Lightweight and can be repurposed easily.
A 1- to 2-liter bottle is generally sufficient for growing a few mint plants.
2. Soil
Opt for a high-quality potting mix. Mint thrives in well-drained soil, so avoid garden soil which may retain too much moisture.
3. Seeds or Cuttings
You can start from seeds, but cuttings are often more reliable for beginners. Look for fresh mint at a nursery or supermarket, ensuring it’s free from pests.
4. Tools
- Scissors or garden shears for cutting.
- A small shovel or spoon for filling the bottle.
- A funnel (optional) to add soil without mess.
Step-by-Step Guide to Growing Mint in a Bottle
Step 1: Preparing the Bottle

- Clean: If reusing a bottle, make sure it’s thoroughly cleaned to prevent any disease transfer.
- Cut: If using a plastic bottle, cut it in half. Alternatively, you can poke drainage holes at the bottom of a glass bottle.
Step 2: Adding Soil
- Place the bottle upright, ensuring it won’t tip over.
- Fill about one-third of the bottle with potting mix. Leave enough space for roots.
Step 3: Planting the Mint
Using Seeds:
- Scatter a few seeds over the soil surface.
- Lightly cover them with a thin layer of soil.
- Mist lightly with water.
Using Cuttings:
- Cut a healthy stem from an existing mint plant with at least 3-4 leaves.
- Remove the lower leaves, leaving only a couple at the top.
- Place the cutting into the soil, ensuring at least one node (the part where leaves emerge) is buried.
Step 4: Watering
- Water the soil thoroughly after planting. Ensure excess water drains out, as mint does not like soggy roots.
- Going forward, keep the soil slightly moist but not waterlogged.

Step 5: Providing Sunlight
- Place the bottle in a location that receives at least 4-6 hours of sunlight daily, such as near a windowsill.
- If natural light is limited, consider utilizing grow lights to maintain growth.
Step 6: Fertilization
Mint doesn’t require heavy feeding; however, you can use a balanced liquid fertilizer every few weeks to encourage growth. Be cautious not to over-fertilize, which can harm the plant.
Step 7: Pruning
Regular pruning promotes bushy growth. Use scissors to snip off the tops of the plants, which will encourage side shoots. This also prevents the plants from becoming too leggy.
Step 8: Harvesting
You can start harvesting mint leaves once the plant is well-established and has reached a height of at least 6 inches. Always pick leaves regularly; this both encourages new growth and prevents the plant from flowering, which may affect flavor.
Troubleshooting Common Issues
1. Yellowing Leaves
- Cause: Overwatering or poor drainage.
- Solution: Adjust watering frequency and ensure proper drainage.

2. Weak Growth
- Cause: Insufficient light or nutrient deficiency.
- Solution: Move the bottle to a brighter location or fertilize.
3. Pests
- Common Pests: Aphids and spider mites.
- Solution: Use insecticidal soap or neem oil to treat infestations.
4. Flowering Mint
- Observation: Flowering can lead to a decline in flavor.
- Solution: Prune flowering stems promptly.
Frequently Asked Questions (FAQs)
Q: How often should I water my mint?
A: Water when the top inch of soil feels dry. Always ensure good drainage to prevent root rot.
Q: Can I grow mint indoors year-round?
A: Yes, mint can be grown indoors year-round with sufficient light and care.
Q: How long does it take for mint to grow?

A: From cuttings, mint can start to develop roots within a week and will be ready to harvest within 30-60 days under optimal conditions.
Q: What can I use fresh mint for?
A: Fresh mint can be used in teas, salads, desserts, cocktails, or as a garnish for various dishes.
Q: Can I grow mint in water instead?
A: Yes, you can propagate mint in water. Just place cuttings in a glass of water and change the water regularly until roots develop.
Q: Can I grow mint with other herbs?
A: Mint can be invasive, so it’s best grown alone or in a separate container to ensure it doesn’t overwhelm other herbs.
Q: What should I do with excess mint?
A: Excess mint can be dried for later use, used in cooking, or even frozen in ice trays.
Conclusion
Growing mint in a bottle is an excellent way to enjoy this flavorful herb while saving space and effort. With just a few materials and simple steps, you can have fresh mint readily available for various culinary applications. Remember to monitor your plant’s health, provide adequate care, and soon enough, you’ll relish the rewards of your Mint in a Bottle project! Happy gardening!