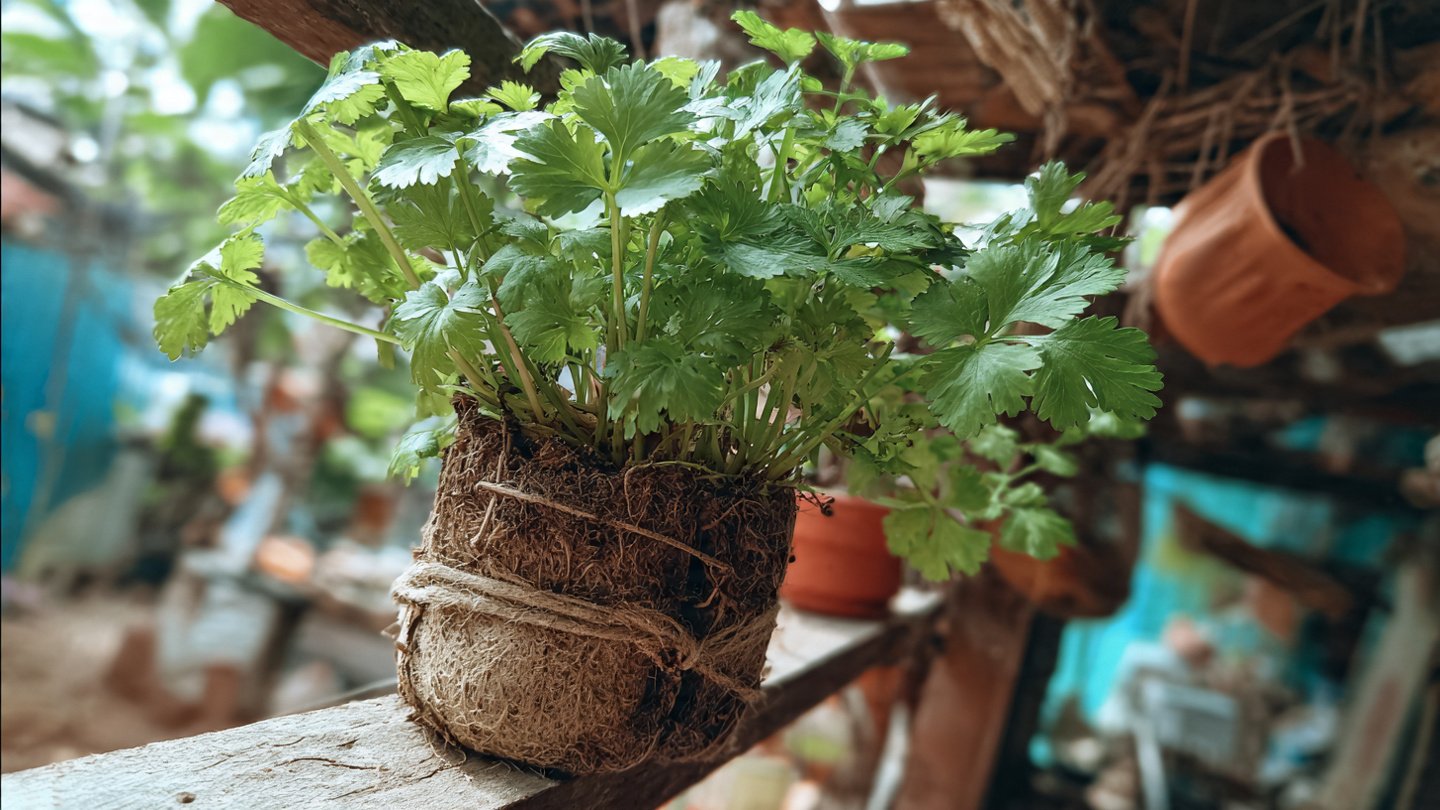
Ultimate Guide to Growing Dhaniya (Cilantro) Using Kitchen Scraps and Creative Techniques
Growing dhaniya, also known as cilantro or coriander, can be a rewarding experience for gardening enthusiasts and culinary aficionados alike. This aromatic herb adds a fresh, vibrant flavor to a variety of dishes, from salsas and salads to soups and curries. Using kitchen scraps and innovative techniques to cultivate dhaniya not only promotes sustainable gardening but also maximizes your kitchen resources. In this guide, we’ll explore how to grow dhaniya effectively with minimal waste, providing an eco-friendly and budget-friendly approach.
Why Grow Dhaniya?
- Easy Steps to Successfully Grow Bhindi in Grow Bags at Home
- Easy Steps to Grow a Healthy Guava Bonsai at Home for Beginners
- How to Successfully Grow and Cultivate White Strawberry Plants at Home for Delicious and Unique Fruits
- Ultimate Guide to Successfully Growing Weeping Fig Outdoors with Proven Techniques and Expert Tips
- How to Successfully Grow Flemish Beauty Pear Trees in Canada for Optimal Harvest
- Easy Hack to Grow Strawberries Year Round in Your Home Garden for Delicious Harvests
- Growing Flemish Beauty Pears in Canada A Complete Guide for Local Gardens
- The Ultimate Guide to Growing Hibiscus Plants Year Round for Vibrant Blooms and Healthy Foliage
- Easy Ways to Boost the Growth Rate of Your Indoor Peace Lily for Lush Green Foliage
- How to Successfully Grow Oak Leaf Lettuce in Your Home Garden for Fresh and Flavorful Salads
-
Culinary Applications: Dhaniya is widely used in culinary practices across various cuisines, adding freshness to dishes.
-
Nutritional Value: Rich in vitamins A, C, and K, as well as minerals like potassium and calcium, dhaniya boasts numerous health benefits.
-
Sustainable Gardening: By using kitchen scraps, you reduce waste and contribute positively to the environment.
Latest Posts
Getting Started: Understanding Dhaniya
Before diving into techniques to grow dhaniya using kitchen scraps, it’s essential to understand the plant itself.
-
Plant Type: Dhaniya is a fast-growing annual herb that thrives in warm weather.
-
Soil and Sun Requirements: It prefers well-drained, fertile soil and requires 6-8 hours of sunlight daily.
-
Watering Needs: Regular watering keeps the soil moist but avoid waterlogging.
Creative Techniques for Growing Dhaniya from Kitchen Scraps
1. Regrowing from Stems

One of the easiest methods to grow dhaniya is by using its leftover stems. Here’s how:
Materials Needed:
- Fresh dhaniya stems with roots attached
- A glass of water
Steps:
- Prepare the Stems: Cut fresh dhaniya stems just above the root ends, leaving about 2-3 inches of stem.
- Watering: Place the stems in a glass of water, ensuring that the roots are submerged.
- Sunlight: Position the glass in a sunny spot. Change the water every couple of days.
- Transplant: After a week, when roots are visible and about 2 inches long, transplant the stems into a pot with well-draining soil.
2. Sprouting Seeds from Scraps
If you have dhaniya seeds from the past season’s harvest or kitchen use, you can sprout them effectively.
Materials Needed:
- Dhaniya seeds
- A small pot or container
- Potting soil

Steps:
- Prepare the Pot: Fill the container with potting soil and water it lightly.
- Sow the Seeds: Scatter the seeds over the soil surface, then cover lightly with soil.
- Water and Light: Water gently and place the container in a sunny area.
- Germination: Seeds usually germinate within 7-10 days. Thin out weaker seedlings to give stronger ones room to grow.
3. Composting Kitchen Scraps for Enriching Soil
Utilizing kitchen scraps to create nutrient-rich compost is vital for a thriving dhaniya garden.
Materials Needed:
- Vegetable peels and scraps (non-citrus)
- Coffee grounds
- Eggshells
- Brown materials (dry leaves, cardboard)
Steps:
- Create a Compost Bin: Use a container or designate a corner in your garden.
- Layer Wisely: Alternate layers of green materials (like vegetable scraps) and brown materials (like dried leaves).
- Moisten and Air: Keep the compost damp and turn it occasionally to aerate.
- Utilization: In about 4-6 weeks, you can mix the finished compost into your dhaniya potting soil for nutrient enrichment.

4. Using Trimmings to Flavor Your Soil
Another fun technique is using leftover dhaniya trimmings to enrich the soil directly.
Materials Needed:
- Fresh dhaniya trimmings
- A small pot or garden patch
Steps:
- Chop Up Trimmings: After using dhaniya, chop the stems and leaves into small pieces.
- Mix into Soil: Incorporate these trimmings directly into the soil where you plan to sow new dhaniya seeds.
- Planting: Wait a few weeks for the organic matter to break down slightly, then plant your seeds.
5. Indoor Hydroponic Method
If you lack outdoor space, consider an indoor hydroponic setup using kitchen scraps.
Materials Needed:
- A plastic container or jar
- Water
- Optional: Liquid nutrients

Steps:
- Prepare the Container: Fill the container with water, leaving some space at the top.
- Add-Stems: Insert fresh dhaniya stems with roots into the water container.
- Sunlight: Place the container in a sunny location, ensuring adequate light.
- Nutrient Addition: For a quicker growth rate, consider adding liquid nutrients according to package instructions.
Maintenance Tips for Thriving Dhaniya
-
Watering: Maintain consistent moisture without causing sogginess.
-
Fertilizing: If you haven’t used compost, a balanced liquid fertilizer every few weeks can encourage growth.
-
Pest Management: Keep an eye out for pests like aphids. Organic solutions like neem oil can help.
-
Pruning: Regularly pinch off leaves to encourage bushier growth and prevent flowering, which can make the leaves taste bitter.
Harvesting Dhaniya
-
Timing: Begin harvesting once the plant is about 6 inches tall, usually around 3-4 weeks after planting.
-
Method: Cut leaves and stems just above the base to encourage regrowth.

-
Frequency: Harvesting regularly can promote continued growth and prevent the plant from going to seed too quickly.
FAQs
1. Can I grow dhaniya indoors?
Yes, dhaniya can grow indoors as long as it receives adequate sunlight (around 6-8 hours daily) and is planted in well-draining soil.
2. How often should I water my dhaniya plants?
Water your dhaniya when the top inch of soil feels dry. Avoid overwatering, which can lead to root rot.
3. Can I regrow dhaniya from supermarket leftovers?
Absolutely! You can use fresh dhaniya stems with roots to regrow your plants.
4. What pests should I watch for when growing dhaniya?
Common pests include aphids, spider mites, and whiteflies. Regular monitoring and organic treatments like neem oil can help manage infestations.
5. How long does it take for dhaniya to grow?
Under optimal conditions, dhaniya can take about 3-4 weeks to reach a harvestable height.
6. Can I grow dhaniya outside in winter?
In colder climates, dhaniya prefers mild conditions. If temperatures drop significantly, consider growing it indoors.
Conclusion
Growing dhaniya using kitchen scraps and creative techniques not only enriches your culinary experience but also aligns with sustainable living practices. This guide provides practical, eco-friendly methods to cultivate dhaniya, ensuring you make the most of what you have while enjoying the lush benefits of home gardening. Whether you’re a seasoned gardener or a novice, incorporating these tips and techniques will allow you to savor fresh, homegrown dhaniya in your cooking all year round. Happy gardening!