Growing your own vegetables can be an incredibly rewarding experience, and few crops are as enjoyable and easy to grow as okra. Spineless okra, in particular, is a popular variety thanks to its tender pods and lack of spines, making it a favorite in home gardens. This article will walk you through the simple method for growing spineless okra in your backyard, from selecting seeds to harvesting.
What is Spineless Okra?
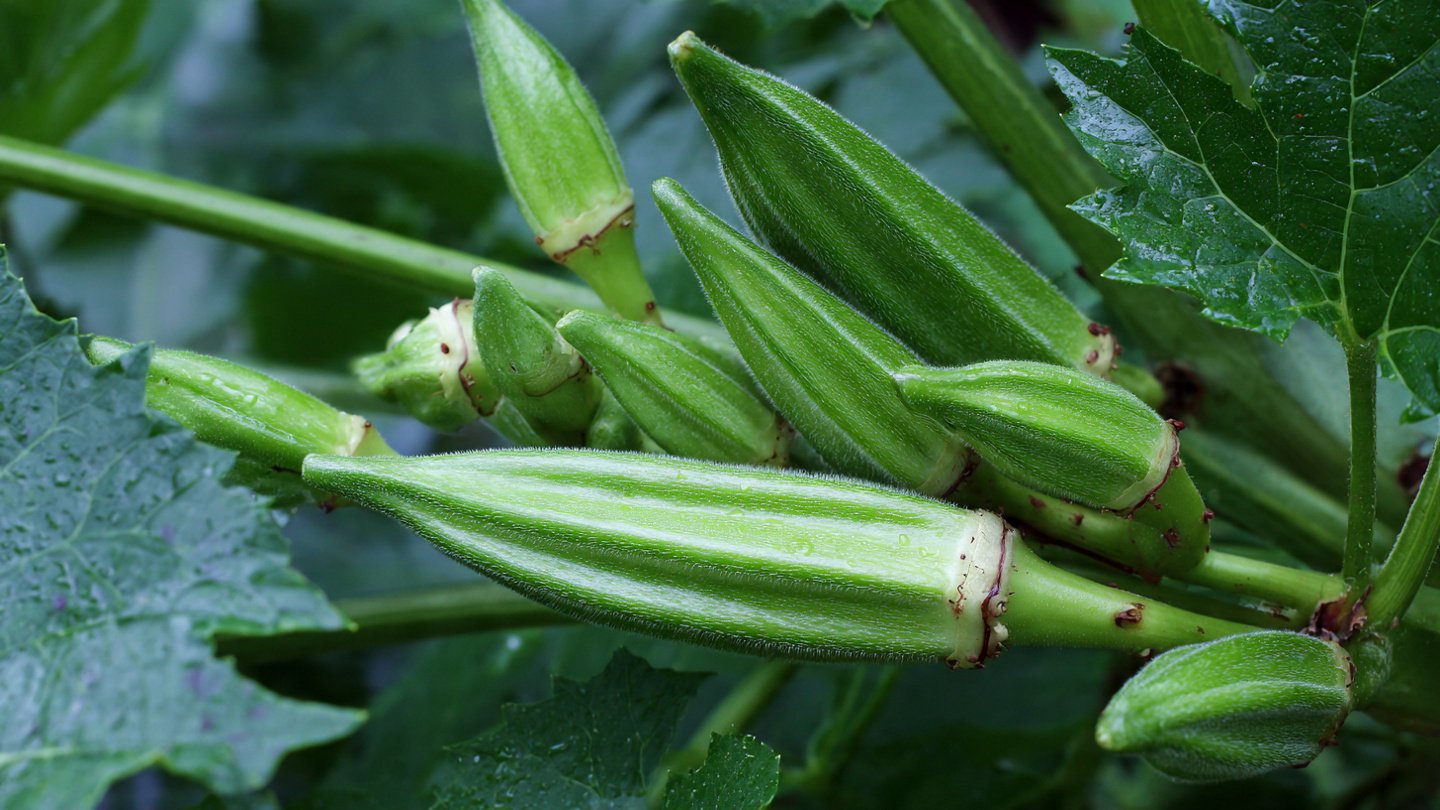
Spineless okra, scientifically known as Abelmoschus esculentus, is a warm-season vegetable that thrives in sunny conditions. Unlike traditional okra varieties that can be prickly, spineless okra features smooth stems and pods, making harvesting much more comfortable. Its tender pods are delicious when cooked in a variety of dishes, from gumbo to stir-fries.
Why Grow Spineless Okra?
- Easy to Manage: Without spines, care and harvesting become easier, especially for gardeners with sensitive skin.
- High Yield: Spineless okra plants can produce a substantial amount of pods throughout the growing season.
- Nutritional Benefits: Okra is rich in vitamins A and C, magnesium, and dietary fiber, making it a healthy addition to your meals.
- Versatile: Okra can be used in various culinary applications, including frying, roasting, pickling, and adding to soups and stews.
Step-by-Step Guide to Growing Spineless Okra
1. Selecting Seeds
The first step in your okra-growing journey is selecting the right seeds. You can find spineless okra seeds at garden centers, online retailers, or through seed exchanges. Some varieties to consider include ‘Clemson Spineless’ and ‘Emerald.’ Check the seed packet for pertinent information regarding your growing zone and other specifics.

2. Preparing the Soil
Okra thrives best in well-drained, nutrient-rich soils. Follow these steps to prepare the soil for planting:
- Location: Find a sunny spot in your garden that receives at least 6-8 hours of sunlight daily.
- Soil Test: Test your soil’s pH level; okra prefers slightly acidic to neutral soil (pH 6.0 to 7.0). You can buy a home soil testing kit or send a sample to a local extension service.
- Amend the Soil: Amend poor soil with organic matter like compost or well-rotted manure to improve fertility and drainage. If necessary, add lime to raise pH or sulfur to lower it.
- Tilling: Till the soil to a depth of about 12 inches to enhance aeration and drainage.
3. Planting the Seeds
The best time to plant spineless okra is after the last frost date in your area. Follow these planting guidelines:
Latest Posts
- Easy Steps to Successfully Grow Bhindi in Grow Bags at Home
- Easy Steps to Grow a Healthy Guava Bonsai at Home for Beginners
- How to Successfully Grow and Cultivate White Strawberry Plants at Home for Delicious and Unique Fruits
- Ultimate Guide to Successfully Growing Weeping Fig Outdoors with Proven Techniques and Expert Tips
- How to Successfully Grow Flemish Beauty Pear Trees in Canada for Optimal Harvest
- Easy Hack to Grow Strawberries Year Round in Your Home Garden for Delicious Harvests
- Growing Flemish Beauty Pears in Canada A Complete Guide for Local Gardens
- The Ultimate Guide to Growing Hibiscus Plants Year Round for Vibrant Blooms and Healthy Foliage
- Easy Ways to Boost the Growth Rate of Your Indoor Peace Lily for Lush Green Foliage
- How to Successfully Grow Oak Leaf Lettuce in Your Home Garden for Fresh and Flavorful Salads
- Spacing: Space your seeds about 3 inches apart in rows that are 3 feet apart. Once they sprout, thin out the weaker plants to give each plant enough room to grow.
- Depth: Plant the seeds about 1 inch deep. Cover them lightly with soil and water gently.
- Watering: Keep the soil moist but not waterlogged. Water the seeds regularly until they germinate, which usually takes about 7 to 12 days.
4. Caring for the Plants
Once your spineless okra has sprouted, it’s time to care for your plants. Here are some essential care tips:

- Watering: Okra requires about 1 inch of water per week. During dry spells, you may need to water more frequently. Deep watering encourages deeper root growth.
- Fertilization: After seedlings are established (about 3-4 weeks old), use a balanced fertilizer every 4-6 weeks to boost growth. A nitrogen-rich fertilizer can promote leafy growth, while phosphorus and potassium support fruit development.
- Weeding: Keep the area around the plants free of weeds, which can compete for nutrients and water.
- Mulching: Apply a layer of mulch around the plants to retain moisture, regulate soil temperature, and deter weeds.
5. Pest and Disease Management
Common pests that can affect okra include aphids, spider mites, and caterpillars. Here’s how to manage them:
- Regular Inspection: Regularly check the plants for signs of infestation, such as distorted leaves or visible bugs.
- Natural Predators: Introduce beneficial insects like ladybugs that feed on aphids.
- Neem Oil: Using neem oil as an insecticide can help minimize pest populations.
- Fungal Diseases: Maintain proper airflow between plants to prevent diseases like powdery mildew. Avoid overhead watering to keep leaves dry.
6. Harvesting
It’s crucial to harvest okra pods at the right time for optimal tenderness:
- Timing: Harvest should begin about 50-65 days after planting, depending on the variety.
- Pod Size: Pick pods when they are about 2-4 inches long. If left too long, they can become tough and fibrous.
- Methods: Use garden scissors or pruning shears to cut pods from the plant, being cautious of the delicate stems.
7. Storing and Using Okra
After harvesting, you can store your okra to enjoy later. Follow these steps:

- Storage: Place the pods in a paper bag and store them in the refrigerator. They should last about 3-5 days.
- Preserving: For longer storage, consider blanching the okra and freezing it. This method retains its flavor and nutritional value.
8. Rotate Your Crop
Practicing crop rotation can improve soil health and reduce pest issues. After harvesting, consider planting a different crop in the same area, such as legumes or leafy greens, for the next season.
FAQs About Growing Spineless Okra
Q1: What kind of soil is best for growing spineless okra?
A: Spineless okra thrives in well-drained, nutrient-rich soil with a pH level between 6.0 and 7.0. Adding organic matter like compost helps improve soil quality.
Q2: How often should I water my okra plants?
A: Okra needs about 1 inch of water per week. During dry spells, you might need to water more frequently, ensuring the soil remains moist but not waterlogged.

Q3: When can I start harvesting spineless okra?
A: You can start harvesting spineless okra approximately 50-65 days after planting, when the pods are about 2-4 inches long.
Q4: Are there any pests that commonly affect okra?
A: Yes, common pests include aphids, spider mites, and caterpillars. Regular inspection and using natural predators or neem oil can help manage these pests.
Q5: Can okra be grown in containers?
A: Yes, spineless okra can be grown in containers as long as the pot is at least 12 inches deep and provides enough space for root growth. Ensure the container has drainage holes.

Q6: Is spineless okra difficult to grow?
A: No, spineless okra is relatively easy to grow, making it suitable for both beginners and experienced gardeners. It requires minimal care and yields abundantly in the right conditions.
Conclusion
Growing spineless okra is an excellent way to enjoy this nutritious and versatile vegetable while enjoying the rewards of gardening. With proper planning, care, and the steps outlined above, you can cultivate a bountiful harvest in your own backyard. So gather your seeds, prepare your soil, and await the delightful pods of spineless okra—your culinary endeavors will thank you! Happy gardening!