Turmeric (Curcuma longa) is a vibrant and aromatic spice that has been cherished for centuries, not only for its culinary value but also for its medicinal properties. Growing turmeric in containers is an excellent option for gardening enthusiasts, especially those with limited space or who live in colder climates. Container gardening allows you to control the growing environment, making it easier to cultivate this tropical plant. This comprehensive guide will walk you through the process of growing and caring for turmeric plants in containers, ensuring a healthy and productive harvest.
Understanding Turmeric and Its Growing Needs
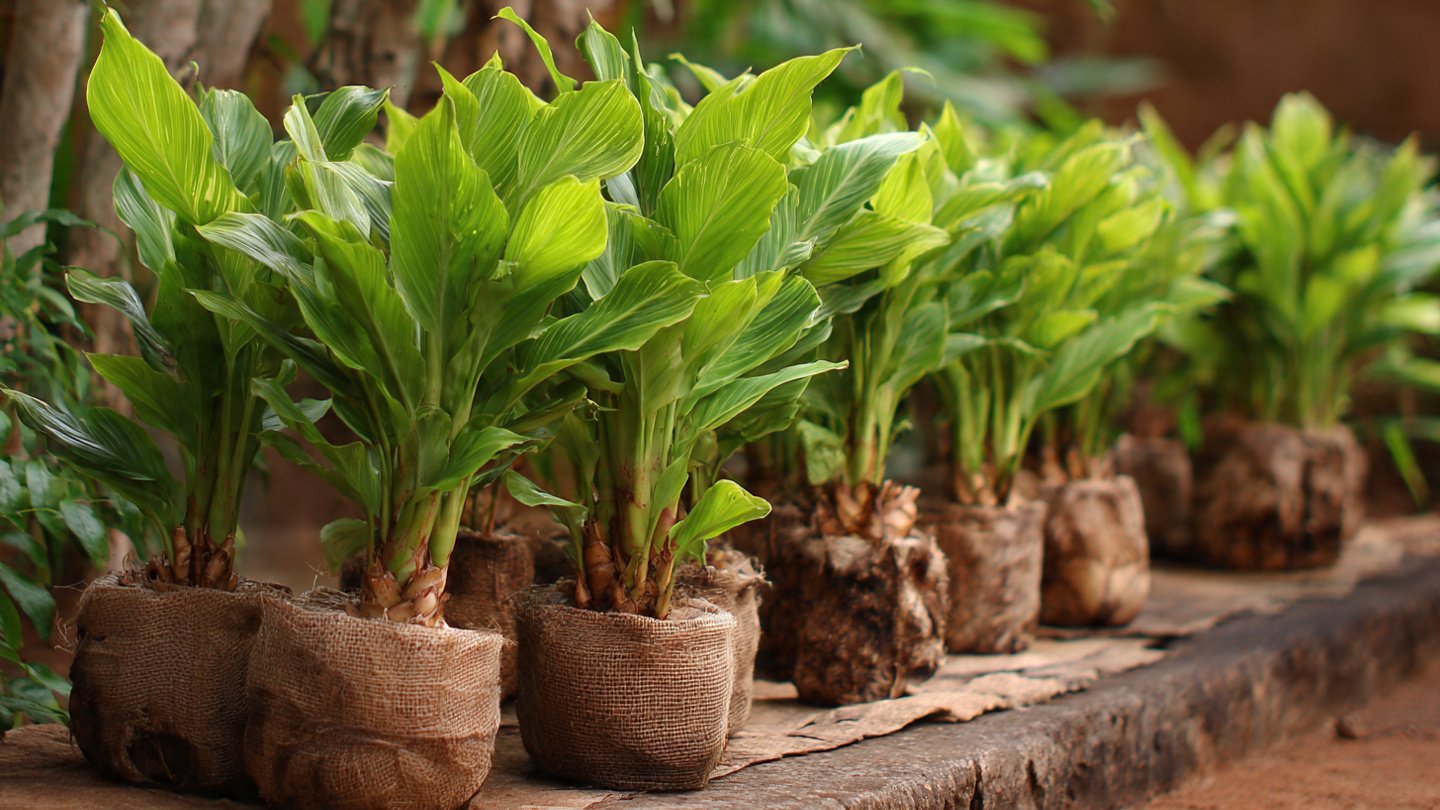
Turmeric is a perennial herbaceous plant that belongs to the ginger family. It thrives in warm, humid climates and requires a long growing season of about 8 to 10 months. The plant produces rhizomes, which are underground stems rich in the yellow-orange spice that is widely used in cooking and natural remedies.
Ideal Growing Conditions for Turmeric
- Temperature: Turmeric prefers temperatures between 68°F (20°C) and 95°F (35°C). It is not frost-tolerant and should be kept indoors or in a greenhouse in cooler climates.
- Light: Turmeric needs bright, indirect sunlight. Too much direct sun can scorch the leaves, while too little light can stunt growth.
- Soil: Well-draining, loamy soil rich in organic matter is ideal. The soil pH should be slightly acidic to neutral, around 6 to 7.
- Water: Consistent moisture is crucial. The soil should be kept moist but not waterlogged, as overly wet conditions can cause rhizome rot.
Selecting the Right Container
Choosing the right container is essential for successful turmeric cultivation. Here’s what to consider:
- Size: Turmeric rhizomes need ample space to expand. A container at least 12 to 16 inches deep and wide is ideal.
- Material: Clay pots are breathable and help prevent waterlogging, but plastic containers are lightweight and retain moisture better.
- Drainage: Ensure the container has multiple drainage holes to prevent water accumulation, which can lead to root rot.
Preparing the Soil Mix
Turmeric thrives in rich, well-draining soil. You can prepare a suitable soil mix by combining:

- 1 part garden soil or potting mix
- 1 part organic compost or well-rotted manure
- 1 part coarse sand or perlite to improve drainage
Mix these components thoroughly to create a nutrient-rich, loose soil bed for your turmeric.
Latest Posts
- Easy Steps to Successfully Grow Bhindi in Grow Bags at Home
- Easy Steps to Grow a Healthy Guava Bonsai at Home for Beginners
- How to Successfully Grow and Cultivate White Strawberry Plants at Home for Delicious and Unique Fruits
- Ultimate Guide to Successfully Growing Weeping Fig Outdoors with Proven Techniques and Expert Tips
- How to Successfully Grow Flemish Beauty Pear Trees in Canada for Optimal Harvest
- Easy Hack to Grow Strawberries Year Round in Your Home Garden for Delicious Harvests
- Growing Flemish Beauty Pears in Canada A Complete Guide for Local Gardens
- The Ultimate Guide to Growing Hibiscus Plants Year Round for Vibrant Blooms and Healthy Foliage
- Easy Ways to Boost the Growth Rate of Your Indoor Peace Lily for Lush Green Foliage
- How to Successfully Grow Oak Leaf Lettuce in Your Home Garden for Fresh and Flavorful Salads
Planting Turmeric Rhizomes
Step 1: Obtain Healthy Rhizomes
Purchase organic turmeric rhizomes from a reputable nursery or market. Select plump, firm rhizomes with visible buds or “eyes” for sprouting.
Step 2: Pre-sprout (Optional)
To encourage faster growth, you can pre-sprout the rhizomes by placing them in a warm, moist environment for a week or two until small shoots appear.
Step 3: Plant the Rhizomes
- Fill the container with the prepared soil mix, leaving about 2 inches of space from the top.
- Plant the rhizomes 2 to 3 inches deep with the buds facing upward.
- Space multiple rhizomes at least 6 to 8 inches apart.
- Cover with soil and gently pat it down.
Step 4: Water Thoroughly
Water the soil well after planting, ensuring it is evenly moist but not soggy.

Caring for Turmeric Plants in Containers
Light and Temperature Management
Place your container in a location that receives bright, indirect sunlight for at least 6 to 8 hours a day. If growing indoors, a spot near a south or east-facing window works well. During colder months or in cool climates, consider using a grow light and keep the temperature steady by avoiding drafts.
Watering Schedule
Turmeric requires consistent moisture. Water the plants regularly to keep the soil evenly moist, but avoid waterlogging. During hot weather, you may need to water more frequently. Use room temperature water and water deeply so that it reaches the rhizomes.
Fertilizing
Feed your turmeric plants every 4 to 6 weeks using an organic balanced fertilizer or compost tea. Avoid excessive nitrogen fertilizers since they promote leafy growth but reduce rhizome development. A fertilizer rich in potassium and phosphorus supports healthy root growth.
Mulching
Apply a thin layer of organic mulch (such as coconut coir, straw, or shredded leaves) on top of the soil to retain moisture and regulate soil temperature. Mulching also suppresses weeds and provides a conducive environment for rhizome growth.

Pruning and Maintenance
Turmeric plants grow tall and can become leggy. You can trim back the leaves if needed to maintain the plant’s shape and encourage better airflow. Remove any dead or yellowing leaves promptly to maintain plant health.
Pest and Disease Control
Common pests include aphids, spider mites, and mealybugs. Regularly inspect your plants and use organic insecticidal soap or neem oil to control infestations.
Turmeric is susceptible to fungal diseases, especially root rot. Ensure proper drainage and avoid overwatering. If you notice yellowing or wilting leaves, check the roots and treat fungal infections promptly.
Harvesting Turmeric
Turmeric typically takes around 8 to 10 months to mature. When the leaves start turning yellow and dry out, it’s time to harvest.

Harvesting Steps:
- Gently loosen the soil around the base of the plant.
- Carefully lift the rhizomes out of the container without damaging them.
- Shake off excess soil and rinse the rhizomes with water.
- Cut off the stems and roots.
- Optionally, allow the rhizomes to dry in a shaded, well-ventilated area for a few days.
Fresh turmeric can be stored in the refrigerator for several weeks, or dried and ground into powder for long-term use.
Tips for Successful Container Turmeric Cultivation
- Choose fresh, disease-free rhizomes for planting.
- Maintain consistent warmth and humidity, especially in cooler climates.
- Avoid waterlogged soil by using well-draining soil and containers with drainage holes.
- Rotate the container periodically to ensure even light exposure.
- Be patient, as turmeric is a slow-growing plant and requires several months to mature.
- Experiment with companion plants like ginger or basil to enhance growth and deter pests.
Conclusion
Growing turmeric in containers is a rewarding gardening project that allows you to enjoy fresh, homegrown turmeric year-round. By providing the right environment, soil, and care, you can successfully cultivate this versatile spice even in small spaces. Whether you’re a seasoned gardener or a beginner, following this complete guide will help you nurture healthy turmeric plants and harvest flavorful rhizomes to enhance your culinary and health endeavors. Happy gardening!