Sure! Here’s a comprehensive 1500-word article on “How to Grow a Thriving Chickpea Plant: Balcony Gardening Guide.”
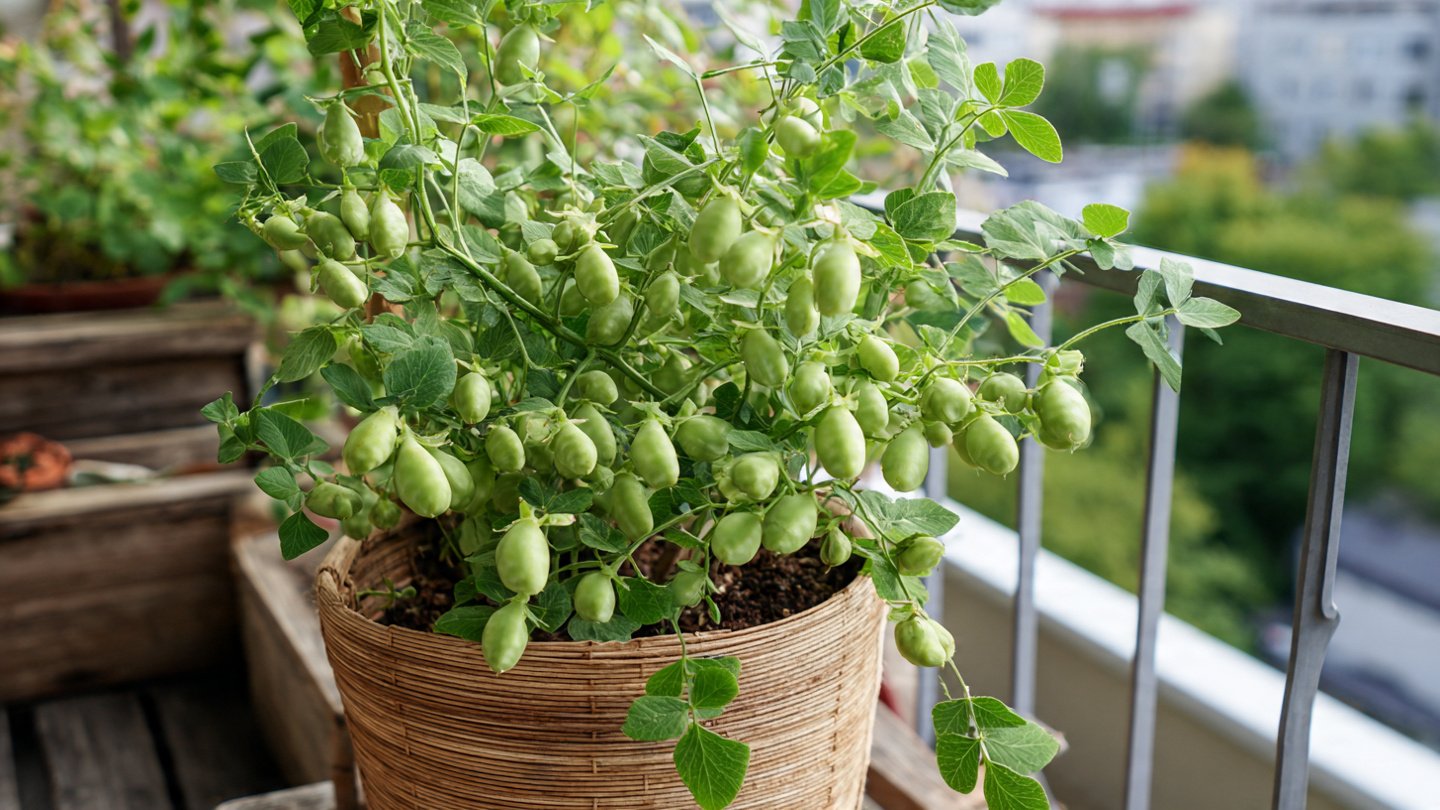
Chickpeas, also known as garbanzo beans, are not only a nutritious and versatile legume but also an excellent addition to any home garden. If you have limited space, such as a balcony, growing chickpeas can still be achieved with a little knowledge and care. This guide will take you through the entire process of growing thriving chickpea plants on your balcony, from choosing the right container to harvesting the delicious pods.
Latest Posts
- Easy Steps to Successfully Grow Bhindi in Grow Bags at Home
- Easy Steps to Grow a Healthy Guava Bonsai at Home for Beginners
- How to Successfully Grow and Cultivate White Strawberry Plants at Home for Delicious and Unique Fruits
- Ultimate Guide to Successfully Growing Weeping Fig Outdoors with Proven Techniques and Expert Tips
- How to Successfully Grow Flemish Beauty Pear Trees in Canada for Optimal Harvest
- Easy Hack to Grow Strawberries Year Round in Your Home Garden for Delicious Harvests
- Growing Flemish Beauty Pears in Canada A Complete Guide for Local Gardens
- The Ultimate Guide to Growing Hibiscus Plants Year Round for Vibrant Blooms and Healthy Foliage
- Easy Ways to Boost the Growth Rate of Your Indoor Peace Lily for Lush Green Foliage
- How to Successfully Grow Oak Leaf Lettuce in Your Home Garden for Fresh and Flavorful Salads
Why Grow Chickpeas on a Balcony?
Balcony gardening is an excellent way to bring fresh, homegrown produce to your urban living space. Chickpeas are rich in protein, fiber, vitamins, and minerals, making them a healthy addition to your diet. Growing your own chickpeas allows you to avoid pesticides and chemicals used in commercial farming, ensure freshness, and enjoy the rewarding experience of cultivating your food.
Chickpeas are also relatively easy to grow compared to many other legumes, making them suitable for beginners. Plus, their compact growth habit fits well into the limited space of a balcony garden.
Step 1: Understanding Chickpeas and Their Growth Requirements
Before you start planting chickpeas, it’s essential to understand their basic growing needs:
- Climate: Chickpeas prefer cool weather during the early stages of growth and warmer weather for pod development. They are generally grown in spring or fall in temperate climates.
- Sunlight: Receiving 6-8 hours of direct sunlight daily is ideal.
- Temperature: Ideal growing temperature ranges between 50°F and 85°F (10°C to 29°C). High humidity or excessive moisture might cause fungal diseases.
- Soil: Well-draining, sandy or loamy soil with a neutral to slightly alkaline pH (6.0-8.0) is perfect.
- Water: Chickpeas require moderate watering, careful to avoid waterlogging which can cause root rot.
Step 2: Choosing the Right Container for Your Balcony
Since chickpeas grow on relatively small bushes, a container that is at least 12-15 inches deep and wide will be sufficient. Use pots or planter boxes with drainage holes to prevent water stagnation.

Recommended Container Types:
- Terracotta pots: Allow soil to breathe.
- Plastic pots: Lightweight and retain moisture better.
- Fabric grow bags: Enhance root aeration and drainage.
You can grow multiple chickpea plants in a large planter box by spacing them about 6-8 inches apart.
Step 3: Selecting Quality Seeds
Purchase high-quality chickpea seeds from a reputable nursery or seed supplier. There are two main types of chickpeas:
- Desi: Smaller, darker, and with a rough coat.
- Kabuli: Larger, beige, and smoother.
Both types grow well in containers, but Kabuli varieties are often preferred for their milder flavor and ease of cooking.
Step 4: Preparing the Soil and Sowing Seeds
Preparing the Soil Mix:
Since container soil dries faster, prepare a nutrient-rich, well-draining mix. Combine:
- 2 parts potting soil or garden soil
- 1 part compost or well-rotted manure
- 1 part sand or perlite for drainage

Fill your selected container with this mixture, leaving about an inch of space from the rim.
Sowing Seeds:
- Plant seeds about 1 to 2 inches deep.
- Space seeds 6-8 inches apart to give room for growth.
- Water the soil gently but thoroughly after sowing.
You can start seeds indoors or directly sow them in the container if temperatures are warm enough.
Step 5: Caring for Your Chickpea Plants
Watering:
- Water chickpeas moderately and consistently.
- Avoid overwatering; wait until the top inch of soil is dry before watering again.
- Reduce watering once pods start to develop to allow plants to mature fully.
Light:
Place your container where it receives 6-8 hours of sunlight daily. If sunlight is limited, use a grow light to supplement.
Feeding:

- Chickpeas are nitrogen-fixing, meaning they enrich the soil by converting atmospheric nitrogen into usable forms.
- However, feeding with a balanced organic fertilizer or compost tea once or twice during the growing season encourages better pod development.
Supporting Plants:
- Chickpea plants grow about 2-3 feet tall.
- Most varieties do not require staking, but if your plants are tall and leggy, provide support using bamboo sticks or trellises.
Step 6: Managing Pests and Diseases
Chickpeas are relatively hardy but can be affected by common pests and diseases.
Pests to Watch For:
- Aphids
- Spider mites
- Cutworms
Use natural pest control methods such as neem oil spray or insecticidal soap. Introducing beneficial insects like ladybugs helps control aphid populations.
Diseases:
- Root rot (due to waterlogging)
- Powdery mildew
- Fusarium wilt

Prevent diseases by ensuring proper drainage, good air circulation, and avoiding overhead watering.
Step 7: Harvesting Chickpeas
Chickpeas typically mature in about 90-100 days after planting.
Signs of Ready-to-Harvest Chickpeas:
- Pods dry and turn brown or tan.
- Seeds inside become firm and hard.
Harvest by:
- Plucking dry pods from the plant.
- Shelling the chickpeas from the pods.
- For fresh chickpeas, you can harvest green pods earlier (around 65-70 days).
After harvesting, allow chickpeas to dry completely if you intend to store them.
Step 8: Storing and Using Your Chickpeas
Dried chickpeas can be stored in airtight containers in a cool, dry place for up to a year.
Cooking Tips:

- Soak dried chickpeas overnight before cooking.
- Use chickpeas in a variety of dishes such as hummus, salads, stews, and curries.
Additional Balcony Gardening Tips for Success
- Rotate your crops: Avoid planting chickpeas in the same container consecutively to prevent soil-borne diseases.
- Mulch: Applying mulch on the soil surface helps retain moisture and regulate temperature.
- Regular Monitoring: Check your plants daily for signs of pests or nutrient deficiencies.
- Companion Plants: Planting early herbs like coriander or mustard nearby can help repel pests.
Conclusion
Growing chickpeas on a balcony is a rewarding experience that yields tasty, nutritious legumes while brightening your outdoor space. With the right container, quality seeds, good soil, and attentive care, you can enjoy a thriving chickpea harvest right from your balcony. Whether you’re a seasoned gardener or a beginner, chickpeas offer an easy and fruitful gardening project to add to your home-grown kitchen staples.
So get your pots ready, sow those seeds, and start your journey toward growing your own chickpeas today!
If you’d like, I can also prepare a summary or provide a quick checklist to help you get started immediately. Would you like that?