Pea greens, the tender young shoots and leaves of pea plants, are a delightful addition to salads, sandwiches, and various dishes. They are packed with nutrients, offering a fresh, slightly sweet flavor that can enhance your meals. If you’re looking to grow your own pea greens, you’re in luck! This guide will provide you with everything you need to know to cultivate pea greens easily, even if you’re a beginner.
What Are Pea Greens?
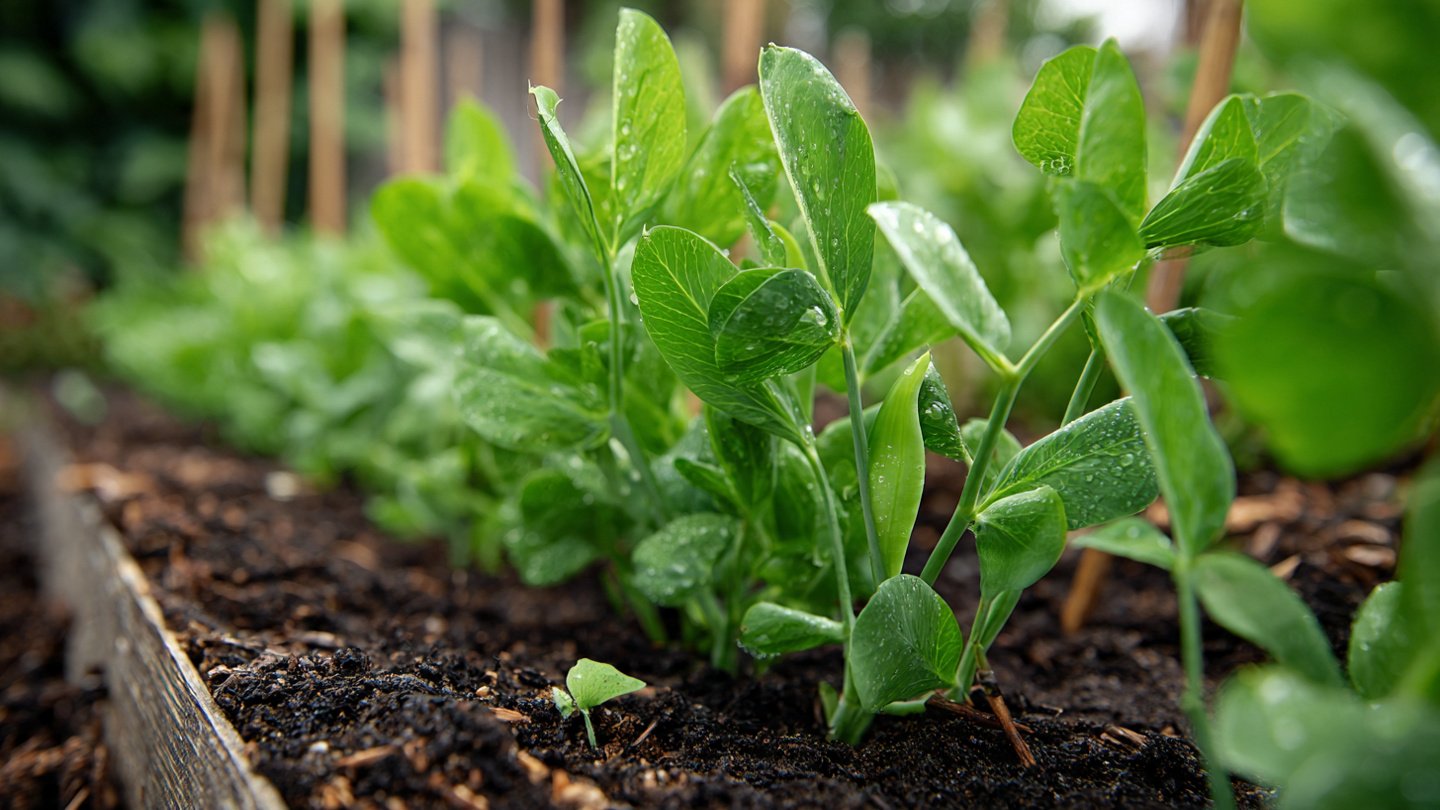
Pea greens are the young, tender shoots of pea plants (Pisum sativum). They are not only delicious but also highly nutritious; they are rich in vitamins A, C, and K, and are a good source of protein and fiber. Their delicate leaves and tendrils add a unique texture to dishes, making them a favorite in many culinary recipes.
Benefits of Growing Pea Greens
- Quick Growth: Pea greens grow rapidly, often ready to harvest in just a few weeks.
- Minimal Space Required: They can be grown in small spaces, making them perfect for urban gardening.
- Nutrient-Rich: Packed with vitamins and minerals, they offer numerous health benefits.
- Versatile Use: Pea greens can be eaten raw in salads or cooked in various dishes.
- Sustainable Crop: They help fix nitrogen in the soil, improving soil fertility.
Step-by-Step Guide to Grow Pea Greens
Step 1: Selecting Seeds
The first step in growing pea greens is selecting the right variety of pea seeds. Here are some popular options:

- Sugar Snap Peas: These peas are sweet and provide tender greens.
- Snow Peas: Flat pods that are harvested before they fully develop.
- Green Peas: These produce lush greens with a slightly different flavor.
Choose disease-resistant varieties for better success rates. Visit your local nursery or shop online to purchase organic, non-GMO seeds.
Step 2: Preparing the Soil
Pea greens thrive in well-draining, nutrient-rich soil. Here’s how to prepare your soil:
Latest Posts
- Easy Steps to Successfully Grow Bhindi in Grow Bags at Home
- Easy Steps to Grow a Healthy Guava Bonsai at Home for Beginners
- How to Successfully Grow and Cultivate White Strawberry Plants at Home for Delicious and Unique Fruits
- Ultimate Guide to Successfully Growing Weeping Fig Outdoors with Proven Techniques and Expert Tips
- How to Successfully Grow Flemish Beauty Pear Trees in Canada for Optimal Harvest
- Easy Hack to Grow Strawberries Year Round in Your Home Garden for Delicious Harvests
- Growing Flemish Beauty Pears in Canada A Complete Guide for Local Gardens
- The Ultimate Guide to Growing Hibiscus Plants Year Round for Vibrant Blooms and Healthy Foliage
- Easy Ways to Boost the Growth Rate of Your Indoor Peace Lily for Lush Green Foliage
- How to Successfully Grow Oak Leaf Lettuce in Your Home Garden for Fresh and Flavorful Salads
- Choose a Container or Garden Bed: If planting in pots, select containers that are at least 3-6 inches deep. Ensure they have drainage holes.
- Soil Mix: Use a blend of potting soil, compost, and peat moss to retain moisture while providing good drainage. Ideally, the soil pH should be around 6.0 to 7.0.
- Aerate the Soil: Use a garden fork or tiller to aerate the soil and mix in compost for added nutrients.
Step 3: Sowing Seeds
Once your soil is prepared, it’s time to sow the seeds:

- Soaking Seeds: For best results, soak the pea seeds in water for 2-4 hours before planting to encourage germination.
- Planting Depth: Sow the seeds about 1-2 inches apart and 1 inch deep in the soil. If you’re planting in rows, space the rows about 6-8 inches apart.
- Covering Seeds: Gently cover the seeds with soil and water lightly to ensure good contact with the soil.
Step 4: Watering and Care
Proper watering and care are essential for successful growth:
- Watering: Keep the soil consistently moist but not waterlogged. Water gently to avoid displacing the seeds.
- Light: Pea greens prefer full sun to partial shade. Aim for at least 6 hours of sunlight per day. If you’re growing indoors, place them near a sunny window or use grow lights.
- Temperature: Pea greens grow best in cooler temperatures, ideally between 55°F to 70°F. If temperatures rise, consider providing shade.
- Fertilization: If you used nutrient-rich compost, additional fertilization might not be necessary. However, a balanced liquid fertilizer can be applied every couple of weeks if desired.
Step 5: Pest and Disease Management
While pea greens are generally resilient, pests and diseases can still pose a threat:
- Common Pests: Watch out for aphids, slugs, and spider mites. You can remove them manually or use insecticidal soap if infestations occur.
- Disease Prevention: Ensure good air circulation around plants. Avoid overhead watering to reduce the risk of fungal diseases. Crop rotation can help prevent soil-borne diseases.
- Companion Planting: Consider planting companion plants, such as marigolds, to deter pests naturally.
Step 6: Harvesting
Determining the right time to harvest is crucial for enjoying the best flavor and texture:

- Harvesting Time: Pea greens are typically ready to harvest in about 3-4 weeks after sowing, once they reach around 4-6 inches in height.
- How to Harvest: Use scissors or garden shears to snip off the tops of the shoots, leaving a few leaves and nodes behind for continued growth. This method encourages regrowth.
- Frequent Harvests: You can harvest multiple times for continuous growth, usually every 5-7 days.
Step 7: Storing Pea Greens
To maintain freshness after harvesting:
- Refrigeration: Store harvested greens in a breathable bag in the refrigerator. They should remain fresh for about a week.
- Freezing: If you have an abundance, blanch them in boiling water for a couple of minutes, then quickly cool in ice water. Drain, then pack in airtight containers for freezing.
Step 8: Culinary Uses for Pea Greens
Once you’ve harvested your pea greens, there are countless ways to enjoy them:
- Salads: Toss fresh pea greens into salads for added texture and flavor.
- Cooking: Sauté them briefly in olive oil with garlic, or add them to stir-fries.
- Smoothies: Blend them into smoothies for a nutritious boost.
- Sandwiches: Use them as a fresh topping for sandwiches or wraps.
- Garnish: Add them as a garnish to soups and plates for an elegant touch.
Troubleshooting Common Issues
Even with careful planning, challenges may arise. Here are some common issues and solutions:

- Slow Growth: If growth seems sluggish, check for insufficient light or overly compacted soil.
- Leggy Plants: If your pea greens are stretching towards light, they may not be receiving enough sunlight. Consider relocating them to a sunnier spot.
- Pests: If you notice insect damage, increase vigilance or invest in organic pest control methods.
Conclusion
Growing pea greens is a rewarding and easy gardening venture that accommodates beginners and seasoned gardeners alike. By following this step-by-step guide, you can enjoy fresh, nutritious pea greens right from your garden. Whether you choose to include them in salads, stir-fries, or as garnishes, the delightful flavor of homegrown pea greens will surely elevate your culinary creations. With just a little care and attention, you’ll soon have a thriving patch of these delicious greens to enjoy!