
Growing tomatoes in plastic bottles is one of the most innovative methods for urban and small-space gardening. This technique saves space, reduces soil usage, and allows for easy mobility. It is ideal for balconies, terraces, and small backyards. Plastic bottles create a self-contained environment that retains moisture and nutrients effectively. Additionally, this method encourages recycling and promotes eco-friendly practices. Anyone, from beginners to experienced gardeners, can try this approach. In this article, we will guide you through every step, from bottle preparation to harvesting your first juicy tomatoes.
Why Plastic Bottle Gardening Works
Plastic bottle gardening works because it provides a controlled micro-environment for tomato plants. The transparent plastic allows light penetration while maintaining humidity. Bottles retain water longer than open soil beds, reducing irrigation frequency. Their vertical structure maximizes space efficiency and makes harvesting easier. This method also prevents soil-borne diseases and pests. With minimal cost, plastic bottles provide an excellent alternative to traditional gardening. The result is fast-growing, healthy tomatoes that thrive even in limited space.
Choosing the Right Bottle and Tomato Variety
Use 1.5–2-liter transparent plastic bottles for ideal results. Bottles should be clean, free of labels, and have a wide mouth for easy planting. For tomato varieties, choose dwarf or determinate types like Cherry, Roma, or Patio tomatoes. These varieties adapt well to container growth and produce fruit faster. Avoid large, indeterminate varieties unless supported with trellises. Matching the right tomato variety with bottle size ensures better growth, reduces stress, and improves yield.
Preparing the Plastic Bottle
Start by cutting the bottle horizontally or making vertical side openings for planting. Ensure proper drainage by poking 3–5 small holes at the bottom. Wash the bottle thoroughly with mild soap and rinse completely to remove chemicals. Optionally, paint or cover bottles partially to prevent root overheating. Adding a hanger or base support improves stability. Proper preparation ensures roots remain healthy and prevents waterlogging. A well-prepared bottle provides a stable environment for consistent growth.

Preparing Soil for Bottle Tomatoes
Tomatoes require nutrient-rich, well-draining soil. Use a mix of garden soil, compost, coco peat, and sand in a 2:2:1:1 ratio. This ensures both aeration and moisture retention. Adding organic fertilizers like composted manure enhances nutrient availability. Adjust soil pH to 6–6.5 for optimal tomato growth. In bottles, soil should fill about ¾ of the bottle height. Proper soil preparation prevents nutrient deficiency, promotes root development, and supports faster growth.
Latest Posts
- Easy Steps to Successfully Grow Bhindi in Grow Bags at Home
- Easy Steps to Grow a Healthy Guava Bonsai at Home for Beginners
- How to Successfully Grow and Cultivate White Strawberry Plants at Home for Delicious and Unique Fruits
- Ultimate Guide to Successfully Growing Weeping Fig Outdoors with Proven Techniques and Expert Tips
- How to Successfully Grow Flemish Beauty Pear Trees in Canada for Optimal Harvest
- Easy Hack to Grow Strawberries Year Round in Your Home Garden for Delicious Harvests
- Growing Flemish Beauty Pears in Canada A Complete Guide for Local Gardens
- The Ultimate Guide to Growing Hibiscus Plants Year Round for Vibrant Blooms and Healthy Foliage
- Easy Ways to Boost the Growth Rate of Your Indoor Peace Lily for Lush Green Foliage
- How to Successfully Grow Oak Leaf Lettuce in Your Home Garden for Fresh and Flavorful Salads
Planting Tomato Seedlings
Choose healthy seedlings with strong stems and 2–3 leaves. Plant one seedling per bottle to prevent overcrowding. Position roots carefully to avoid bending or damage. Cover roots with soil and gently pat to remove air pockets. Water lightly after planting to help seedlings settle. Place bottles in a sunny location with at least 6 hours of sunlight. Vertical arrangement or hanging placement improves air circulation and reduces disease risk. Proper planting ensures strong initial growth.
Watering and Irrigation Tips
Plastic bottle tomatoes retain water well but still require consistent moisture. Water 2–3 times per week or whenever soil feels dry. Avoid overwatering to prevent root rot. Drip irrigation or small bottles with holes can maintain constant moisture. Mulching the top layer reduces evaporation. Proper watering encourages deep root growth, improves nutrient absorption, and supports consistent fruit production. Monitor plants daily for early signs of dehydration or excess moisture.
Fertilization Strategy
Tomatoes are heavy feeders and require balanced nutrition. Apply liquid organic fertilizer every 2–3 weeks. Mix compost tea, fish emulsion, or diluted water-soluble NPK fertilizer. High potassium content encourages flowering and fruiting. Avoid over-fertilizing nitrogen as it promotes leafy growth at the expense of fruit. Fertilization schedule table:

| Week | Fertilizer Type | Notes |
|---|---|---|
| 1–2 | Compost tea | Encourage root establishment |
| 3–4 | NPK 10-10-10 | Promote healthy vegetative growth |
| 5–6 | Potassium-rich fertilizer | Boost flowering and fruiting |
Sunlight Requirements
Tomatoes need at least 6–8 hours of direct sunlight daily. Position bottles on balconies, terraces, or near windows with maximum light. Rotate bottles weekly if sunlight is uneven. Partial shading can be applied in hot climates to prevent leaf burn. Adequate sunlight ensures strong stems, healthy leaves, and vibrant fruit. Vertical bottle arrangement optimizes light exposure and minimizes competition. Sunlight is a critical factor for high-yield, flavorful tomatoes.
Supporting Tomato Plants
Even small tomato plants may require support in bottles. Use bamboo sticks, wire trellises, or strings for vertical growth. Tie stems loosely to prevent damage. Supporting plants prevents bending, breakage, and improves air circulation. Proper support allows tomatoes to grow straight, reduces fungal infections, and eases harvesting. Lightweight supports are perfect for portable bottle gardens.
Pruning and Maintenance
Pruning is essential for determinate tomato varieties. Remove lower leaves that touch the soil to reduce disease risk. Pinch side shoots for stronger main stems. Maintain 3–4 main branches for optimal fruit production. Clean pruning tools to avoid disease spread. Regular maintenance encourages healthy foliage, faster fruiting, and improves overall plant vigor. A well-pruned tomato plant is productive and visually appealing.
Pest and Disease Management
Common pests include aphids, whiteflies, and spider mites. Use neem oil, insecticidal soap, or organic sprays for prevention. Keep leaves dry and ensure good airflow to prevent fungal diseases. Remove infected leaves promptly. Plastic bottles elevate plants, reducing soil-borne diseases. Early detection and consistent care prevent significant losses. Healthy plants yield higher quality fruits.

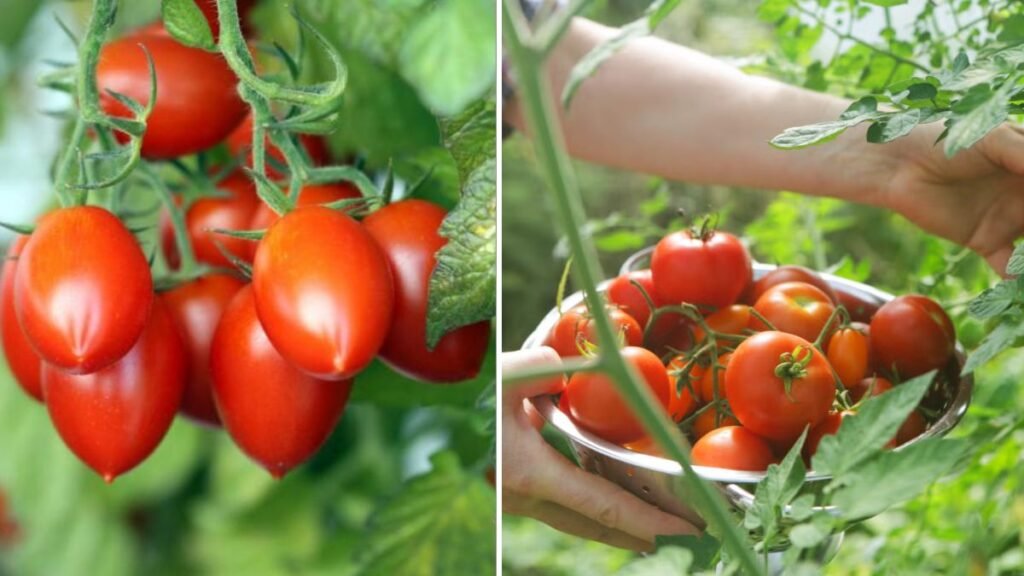
Harvesting Timeline
Cherry tomatoes may be ready in 60–70 days, while larger varieties take 80–90 days. Harvest when fruits are fully colored and slightly firm. Frequent harvesting encourages continuous fruiting. Use scissors or gentle twisting to avoid stem damage. Plastic bottle setup allows easy access and reduces fruit bruising. Early harvest improves plant productivity and maximizes yield.
Benefits of Plastic Bottle Gardening
- Eco-friendly by recycling bottles
- Space-efficient vertical gardening
- Controlled environment reduces water usage
- Easier pest and disease management
- Lightweight and portable for small spaces
This method is ideal for urban dwellers and small-scale farmers. The benefits make it one of the most cost-effective and practical ways to grow tomatoes.
Creative Garden Designs
Arrange bottles in vertical towers or hanging rows. Mix tomato varieties for colorful harvests. Add decorative elements like painted bottles or garden stakes. Hanging setups save floor space and improve aesthetics. Vertical gardens also increase airflow and reduce competition among plants. Creative design combines practicality and beauty for home gardening enthusiasts.
Tips for Container Expansion
Increase tomato production by adding more bottles in vertical rows. Ensure each bottle receives sunlight and adequate water. Rotate plants regularly for even growth. Use larger bottles for bigger varieties. Expanding your bottle garden allows year-round harvesting with minimal effort. Proper planning ensures continuous productivity and efficient resource use.

Environmental Impact
Reusing plastic bottles reduces waste, promotes sustainability, and minimizes the need for large land areas. Bottle gardening uses fewer pesticides and fertilizers. Eco-friendly practices create healthier fruits and reduce environmental harm. This method is ideal for urban gardening initiatives and community projects.
Challenges and Solutions
Challenges include overheating, limited root space, and nutrient depletion. Solve by partially shading bottles, using high-quality soil, and fertilizing regularly. Rotate plants to reduce stress. Early intervention prevents major setbacks. Awareness of these challenges ensures successful tomato growth in bottles.
Conclusion
Plastic bottle tomato gardening is simple, cost-effective, and highly productive. With proper planting, soil preparation, watering, and maintenance, anyone can achieve a successful harvest. This innovative method saves space, promotes sustainability, and produces healthy, juicy tomatoes. Urban gardeners, beginners, and experts can all enjoy the benefits of this creative technique.
